Alternate title:
Slippery Slopes (When Wet)
Moisture is the essence of wetness, and wetness is the essence of beauty.
Zoolander
Remarkably, it’s been a year since I published a post on my experiments with rehydrating coffee (and its brief follow-up). In that time, I’ve been surprised to see that of every strange thing I’ve written, that is the post that inspired the most conversation.
Covid-19 disrupted supply chains around the world—domestic prices in producing countries rose, creating a competitive market for specialty coffee that hasn’t existed in years, even as the c-market stayed low and exchange rates benefitted buyers in the US; mills and docks, pummeled by covid-19 precautions, moved at half-capacity or less; shipping slowed, both via sea and land, as supplies of goods built up waiting to be unloaded, shipped, moved.
And then, of course, demand fell for roasters across the U.S.
Green positions for roasters and importers grew long. (I told you they would, didn’t I?) Coffee faded. Many roasters were caught with coffee that was starting to age—and came across my post, in search of solutions.
Roasters from around the world asked me how I executed rehydration at scale, and wondered how difficult it would be to implement at their own roasteries.
So here’s my gift to you: a step-by-step tutorial.
Recently, we presented a tasting kit through our web shop at Phoenix Coffee of 6 ounces of a reference lot of coffee and 6 ounces of the same coffee, but rehydrated. The reference sample measured 9.8% moisture content at the time of roasting (the arrival sample in June measured 10.2% but it’s been a cold month at our roastery so our gas-fired warehouse heater dried things out a bit). I rehydrated it to 16% moisture for its companion. Both lots were roasted using automation to the same profile on a Loring S35 Kestrel in 40 pound batches.
This coffee is 100% Caturra, grown using organic methods at 1346 meters above sea level in Guatemala; hand-picked and sorted for ripeness; floated in clean water; pulped using a drum pulper; fermented underwater using selected yeast (in this case, Laffort ACTIFLORE Rosé) for 30 hours; drip dried for 2 days on raised beds; dried mechanically using low heat and simulated day and night cycles with rests for homogenization over 15 days.
It was harvested beginning in December 2019—in other words, at this point, over a year ago. I’ll admit, though—this is a coffee that was built to last. It’s an essential component of our espresso blend at Phoenix so I buy enough of this one lot to for an entire calendar year. Therefore, it’s important that it resist fade for as long as possible, which it does—owing to the protocols we implemented during harvest and post-harvest processing. For this reason, the differences produced by rehydration might be more subtle—but they’re there.

I took this coffee, then I rehydrated it, at scale.
Here’s how.
Step 1: Measure moisture
I’ve found that rehydrating benefits a coffee only up to a point—specifically rehydrating to the range of 12-16% moisture. In order to know how much water we need to add to the coffee, we need a starting point.
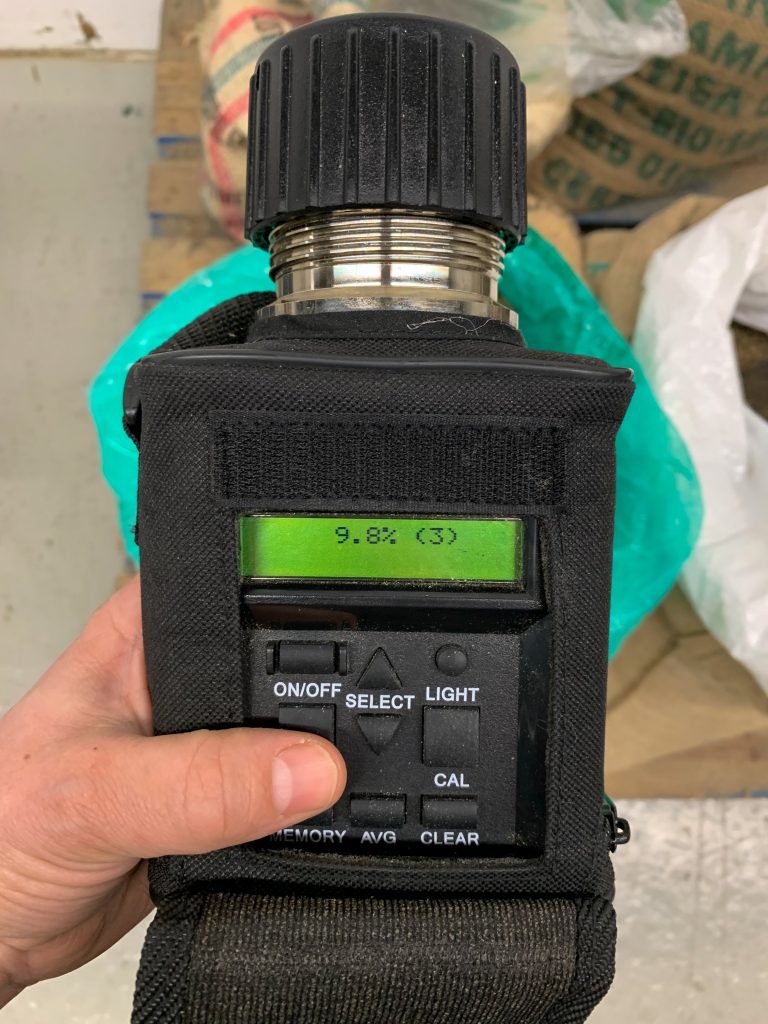
I took measurements from the reference lot of coffee (I always toss my first reading as the sensor and coffee need to come to the same temperature—and then take the average of three additional readings), which came to 9.8%.
Step 2: Calculate how much moisture you need to add
From there, we can calculate how much water we would need to add to coffee to yield both 16% moisture and 40 pounds of green (my batch size). The idea is that we want to start with the same weight in the roaster—40 pounds—since that way the roaster can respond accordingly.
If we were to just start with 40 pounds and rehydrate that, we’d actually be increasing the batch size and the amount of energy needed to drive off moisture and turn that coffee brown—introducing another variable.
Here’s the calculation (I’ve shown my work for you in case it’s been a few years since you’ve done algebra).
I’ve also built a calculator that can assist you.
[final batch size] = ([starting weight] * (1 - [starting moisture % as decimal])) / (1 - [new moisture % as decimal])

y = (x - (1 - MCs)) / ( 1 - MCf)

40 = (x * (1-.098)) /   (1-0.16)

40 = (x * .902) / 0.84

33.6 = x * .902

37.25 = x
So we need to start with 37.25 pounds of green and rehydrate to 40 pounds (in other words, we will add 2.75 pounds of water).
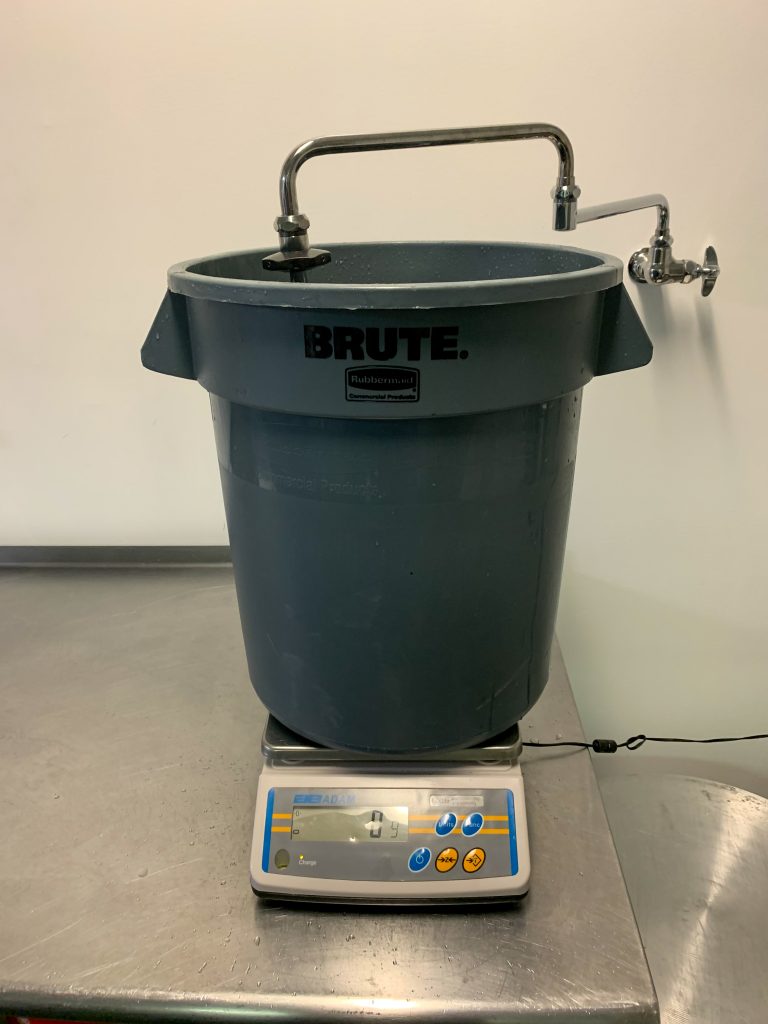
Step 3: Hydrate
I placed 37.25 pounds of green coffee in a food-safe container (a Rubbermaid Brute) with a tight fitting lid on a platform scale and added 2.75 pounds of filtered water on top (I used brewing water).
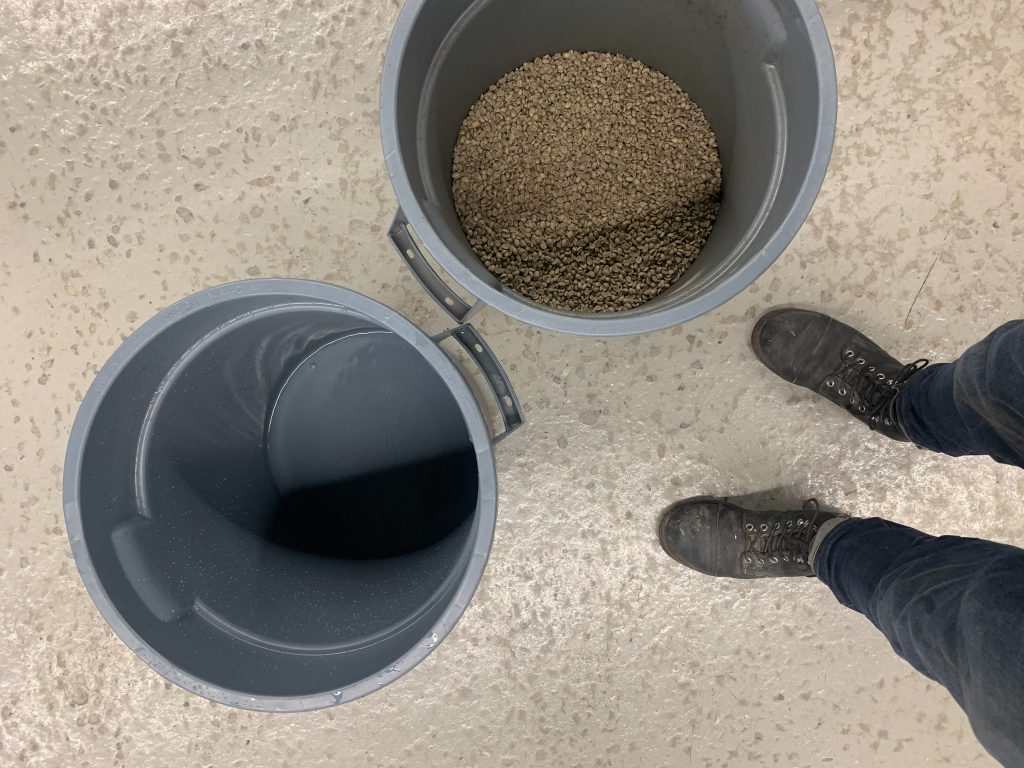
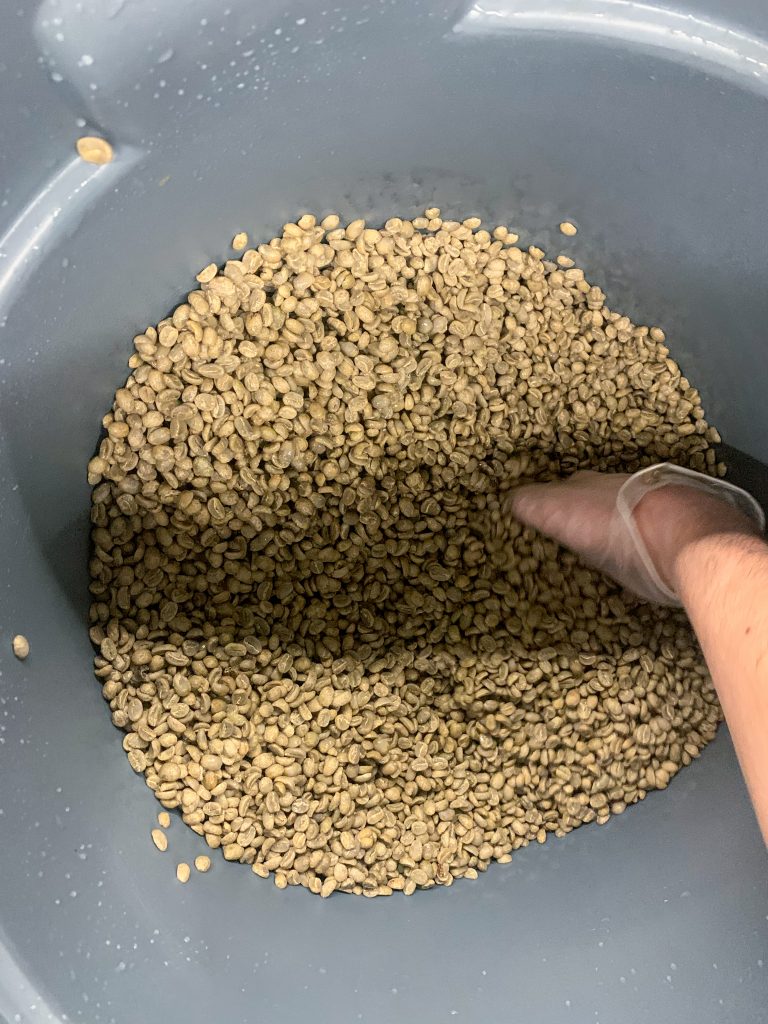
I then mixed using a gloved hand, then closed the lid and agitated/rolled/shook the barrel and mixed inside until the water was evenly dispersed through the coffee pile, and left the lidded barrel in place for 16 hours at 65ºF to allow the water to absorb into the coffee. (Optimizing the amount of time for rehydration is a post for another time. Suffice to say: 16 hours is more than sufficient time for the water to fully absorb into the seed and saturate the capillaries, is brief enough that mold won’t grow, and most importantly, fits into my schedule. Unless you’re using a vacuum to assist, you need to give the coffee at least 8 hours to absorb the water. I don’t recommend leaving it longer than 18-20 hours in order to avoid mold.)
If you have a cement mixer such as those used by many roasteries that do at-scale post-roast blending, this would be a good time to use it, though you’ll need to place the coffee in a closed container with a lid to distribute once you’ve thoroughly mixed the water into the green.
In theory, the idea here is that you can rehydrate your roasting queue for the next morning — before leaving for the day, the roasting team can weigh out green into bulk barrels (or individual batches), rehydrate and mix them, and leave them to homogenize overnight to be roasted the following morning. If needed, you can even rehydrate same day—but this, too, is a post for another time.
Step 4: Roast
As I mentioned—if you’d just added water to 40 pounds of coffee, once rehydrated to 16% the batch size would have grown to 42 pounds. This would require additional energy to drive off the moisture as well as more energy to heat a larger mass, which could change the resulting profile. That’s not necessarily a problem if you’re below your machine’s actual functional capacity but it didn’t suit my purposes for this demonstration. This is why we set the starting batch size to be equivalent, factoring in the added moisture.
I roasted the coffees using the same profile on a Loring S35 Kestrel using the automated “profile roast” feature to ensure consistency.
(I’ve done A-B-X triangulations and the V2 software and upgraded burner together using profile roast automation performs as well as if not better than human operators at replicating a roast curve, provided it’s programmed to respect the operating limits of that roasting system—even though the burner adjustments look pretty wacky).

Note that if you do not use automation, you’ll need more energy to roast a rehydrated lot. For this reason, you should roast smaller-than-capacity batches to understand how it takes on heat, and be prepared to start with sufficient energy, particularly through through the first ~half of the roast. I’ve posted the captured burning settings, which are a result of Loring’s PID adjustments, above—in the foreground is the rehydrated lot, which runs with significantly higher energy than the reference profile in the background.
Why—or how—does rehydration work? I’m not a materials scientist (paging the other Christopher here), but I have some ideas.
In coffee roasting, moisture plays an important and complicated role. The browning reactions that we rely on to develop flavor and aromatic compounds (caramelization, Strecker degradation, and Maillard reactions) are dehydrating reactions and depend on the presence of water. In other words, if there is water available, the reactions can continue. These reactions can, however, be inhibited by the presence of too much moisture, which is why it’s important to drive off moisture to ensure proper development of a roast.
In other words: by having more moisture than usual, though, we can slow down caramelization and Maillard reactions, in particular.
Moisture, too, serves as a transport vessel for heat in coffee roasting, helping to regulate temperature in the seed as it heats and superheats and evaporates, particularly during the early phases of roasting as well as first crack. Moisture also creates a “vapor barrier” that protects coffee from scorching at high temperatures, which can allow us to use high heat in order to drive energy into the coffee rapidly at the start of the roast.
In other words, moisture can assist us with developing the coffee evenly inside and out.
During the drying of parchment coffee, we remove water from the two types of water—impregnation water that is adsorbed into the capillaries and empty spaces inside the seed, as well as solvent water held under osmotic tension in the seed. During rehydration, we are attempting to add water back in to the weakly-bonded capillary water layers. If we were to rehydrate coffee and allow it to homogenize and settle back into the stronger-bonded water held under osmotic tension, it would take more energy to drive off, fundamentally changing the way we would roast the coffee. And because, according to Flávio Borém, “this type of water has biological functions that allow chemical reactions to occur and fungi to develop,” (Handbook of Coffee Post-Harvest Technology p.21) you’re more likely to see mold formation when there is water available in this way.
By keeping water hanging out loosely adsorbed in the capillary layer—like a bunch of out-of-work dudes hanging in the hallway looking for a gig—we can put them to work for us to (a) carry heat into the center of the coffee and promote even development, (b) inhibit the rate of browning reactions initially, pushing them later into the roast allowing the coffee to be roasted more evenly without developing “roasty” character and also without flavors associated with “underdevelopment,” and (c) change the mixture of reactions that occur based on presence of water.
If we were to allow the moisture to homogenize or bind too fully in the coffee, we not only run a risk of growing mold (bad!), but I’d expect that we’d create a situation where there is less free water available to work and the resulting coffee would simply taste vegetal and “fresh”—similar to parchment coffee pulled from a parabolic drier after being dried quickly in a high-heat and high-humidity environment.
Tags: coffee green coffee moisture rehydration
Dear, Chris! Thanks for a wonderful piece of knowledge. I am on to rehydrating now. Remarkably I have 2 fabulous fading coffees (and who doesn’t during these times?…) which I am going to process.
One question – how do you define which should be the level of hydration? Why 16% in this case?
Hey Niko, thanks for reading and for your comment. In this case, I arrived at 16% by trial and error. If you take a starting moisture as anywhere from 9-12%, I’ve played with rehydrating to anywhere from 13-18%. I’ve found best results up to 16% moisture (which happens to be one of the inflection points I look for during drying of coffee). There’s no more profound reason than that—I’ve tried it countless times, and I like how it tastes. If you’re giving it a go for the first time, I recommend starting lower (14% or so) in order to get comfortable not only with the rehydration process but more importantly roasting these coffees.
Gracias Chris, este es un gran sitio. Has condensado mucha información muy útil en un paquete fácil de leer.
This is brilliant, would love to give this a try ….
Hey Christopher. Great article man.I am writting just to thank you for been so gentle to share all this knoledge with us.
Great paper. Congratulations!
Have you ever tried to adjust the moisture level in coffee by controlling the humidity in the storage room?
Regards
Ernst
Hey Ernst, I talk a bit about this — without adjusting temperature accordingly there really is an upper limit to how much ambient moisture coffee will readily absorb.
I really enjoy reading and also appreciate your work.
Excellent information! Thank you very much for sharing this, I ask you. Have you tried rehydrating in coffee and adding some fruit to the water to see if this way you get something new in the flavor profile?
Hi Manuel,
Did you try to rehydrate with fruit infused water? I want to try but couldn’t try yet.
Hello Chris, thank you so much for educating on this topic, I have done this experiment before, but now I clearly see where I have been going wrong. This is super helpful and I am going to do another experiment and am sure it will get better. I am from KENYA.
May I ask about how we should treat with freshness Green Coffee Beans which is easy get Grassy note for New Crop Coffee without enough rest few months after post-harvest and post processing?
If they are still grassy, further rest may be helpful — I find rehydration is best used when the coffee has begun to taste a bit papery.